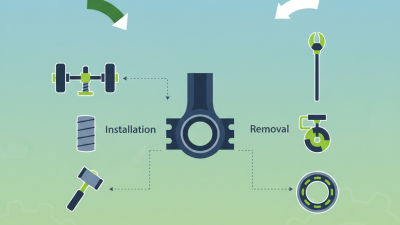
How to Use a Square Taper Bottom Bracket Tool Effectively?
Using a square taper bottom bracket tool is essential for bike maintenance. According to the Bicycle Product Suppliers Association, 80% of cyclists perform their own repairs. This statistic highlights the importance of knowing how to use crucial tools effectively. A square taper bottom bracket tool is specifically designed for bottom bracket installations and removals, making it indispensable for cyclists.
When using this tool, one might encounter some challenges. Not all tools fit every bottom bracket size perfectly. This variance can lead to improper usage if one is not careful. For instance, applying excessive force can strip the threads, leading to costly repairs. Precision is vital. The tool allows for smooth operations when used correctly, yet many overlook the significance of proper technique.
Reflection on personal experiences can enhance your skills. Did you ever feel uncertain about the right amount of pressure when tightening? Such moments can teach valuable lessons. Understanding how to use a square taper bottom bracket tool effectively not only aids in bike repair but can also improve overall cycling experience. Proper knowledge transforms a simple task into an enjoyable part of cycling.
Understanding the Square Taper Bottom Bracket: A Brief Overview
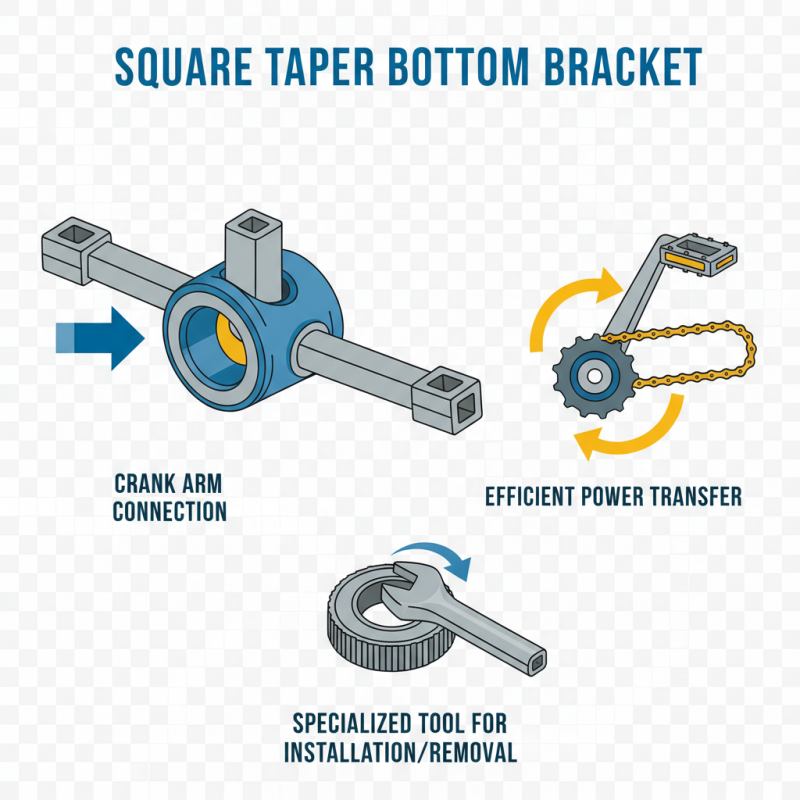
The square taper bottom bracket is a common type of bottom bracket used in bicycles. It features a square-shaped interface that connects the crank arms to the bottom bracket shell. This design allows for effective power transfer, making it a popular choice among cyclists. However, it can be a bit tricky to install or remove if you're not familiar with the tool.
Using a square taper bottom bracket tool requires precision and patience. The tool fits snugly onto the bottom bracket's external notches, allowing you to apply the necessary torque. Aligning the tool correctly can be challenging. You might find it slipping or not engaging fully. It's essential to ensure a proper fit to avoid damaging the delicate threads. A mistake here can lead to more significant problems, like stripped threads or a misaligned crankset.
While many cyclists find the tool easy to use, some might struggle with it. It's important to remember that practice makes perfect. For many, the first time using the tool can feel daunting. But as you gain experience, the process becomes more intuitive. Connecting your cranks should feel satisfying, not frustrating. Don't hesitate to revisit the installation if something feels off. Reflection on each attempt leads to greater skill in the long run.
Essential Tools Needed for Square Taper Bottom Bracket Maintenance
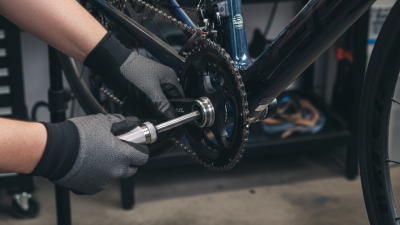
When maintaining a square taper bottom bracket, having the right tools is essential. Begin with a square taper bottom bracket tool. This tool fits snugly onto the bracket and provides the leverage needed for loosening and tightening. It can be a bit tricky to use, though. Make sure to align it properly. A misaligned tool can strip threads and create further issues.
Next, gather a good set of Allen wrenches. These come in handy for removing other components attached to the bottom bracket. A torque wrench is also important. It ensures that the components are tightened to the correct specification, which can prevent future problems. Don't forget about grease. Applying grease to the threads can make removal easier next time.
Complications may arise if proper maintenance is not performed. Rust can develop, making components hard to remove. Over-tightening can lead to damaged threads. It's a good idea to regularly check your bottom bracket for any signs of wear. If you encounter issues, reflect on your maintenance routine. Sometimes, less is more when it comes to tightening. It's a balance that requires practice and patience.
Step-by-Step Guide to Using the Square Taper Tool Effectively
Using a square taper bottom bracket tool effectively requires attention to detail. Begin by gathering all necessary items. You need the tool, a wrench, and potentially some grease. Clean the area around the bottom bracket. Dirt can cause issues.
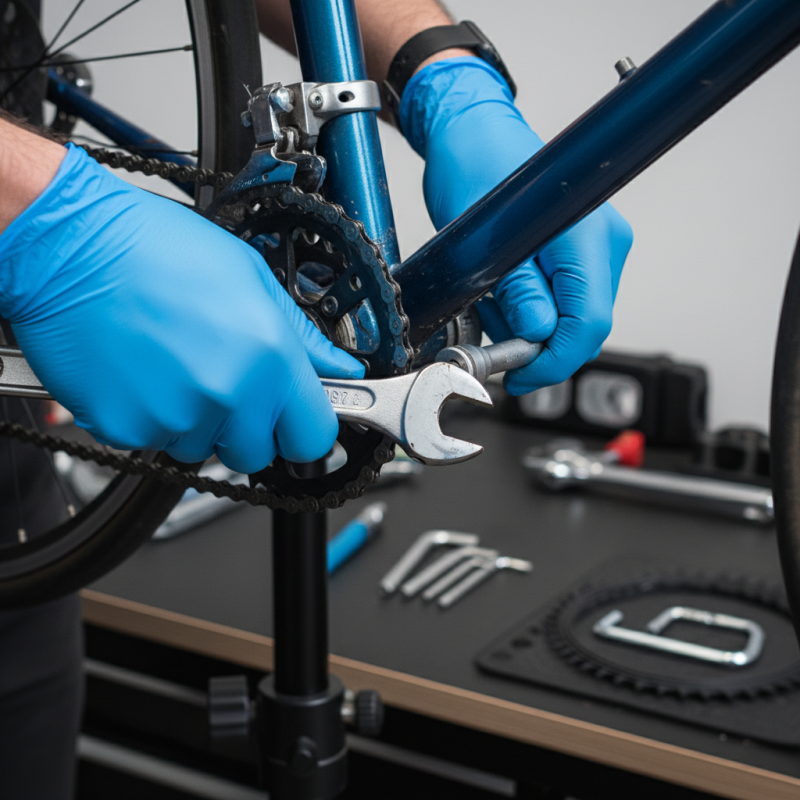
Position the tool on the bottom bracket. Ensure it fits snugly. Sometimes, alignment can be tricky. You may find the tool slipping. If it does, double-check your placement. Applying a bit of grease can help. Grease reduces friction and can make the process smoother.
Begin to turn the wrench slowly. Keep an eye on the tool. Observe if it grips correctly. If it doesn’t, adjust your grip. You may need to apply more pressure. However, be careful not to over-tighten. Stripping the threads can ruin your project. Remember, patience is key. Take your time and reflect on your technique as you progress.
Effectiveness of Using a Square Taper Bottom Bracket Tool
Common Mistakes to Avoid When Using a Bottom Bracket Tool
Using a square taper bottom bracket tool can seem straightforward, but many make critical mistakes. One common error is applying excessive force during the installation. This can damage the threads and lead to a poor fit. Ensure you apply even pressure when tightening. It's crucial to stay patient and check your progress frequently.
Another mistake involves not cleaning the area before starting. Dirt and grease can hinder the process. A clean surface allows for better alignment and smoother operation. A small brush can help remove debris effectively. In addition, misalignment of the tool can lead to stripped threads. Always double-check your positioning before applying any force.
Finally, overlooking proper lubrication is a frequent oversight. A little grease can make a significant difference in both installation and longevity. However, too much can lead to a mess. Strike a balance and ensure you’re not overdoing it. Keep these pointers in mind, and your bottom bracket tool experience will improve significantly.
How to Use a Square Taper Bottom Bracket Tool Effectively? - Common Mistakes to Avoid When Using a Bottom Bracket Tool
| Mistake |
Description |
Solution |
| Incorrect Tool Size |
Using a tool that doesn't fit the bottom bracket properly can damage the threads. |
Always check compatibility before use. |
| Poor Alignment |
Misalignment can lead to stripping threads or improper installation. |
Ensure the tool is aligned correctly with the bottom bracket before applying force. |
| Excessive Force |
Applying too much force can break the tool or damage the bracket. |
Apply gradual pressure and use a torque wrench for accuracy. |
| Ignoring Maintenance |
Using a dirty or worn tool can lead to poor performance. |
Regularly clean and lubricate tools to maintain optimal condition. |
| Skipping the Manual |
Not reading the instruction manual can lead to misunderstandings about the tool's use. |
Refer to the manual for specific guidelines related to your tool. |
Maintenance Tips for Prolonging the Life of Your Bottom Bracket Tool
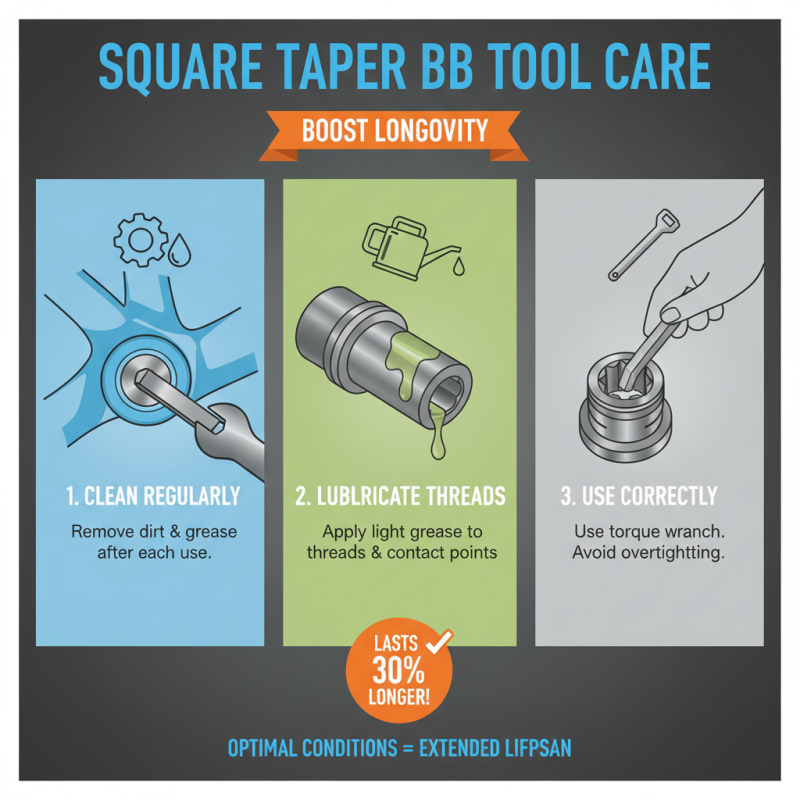
Maintaining a square taper bottom bracket tool is crucial for its longevity and effectiveness. Regular care can extend its lifespan significantly. Studies show that tools used under optimal conditions last up to 30% longer. However, many users neglect basic maintenance, leading to performance issues.
Keep your tool clean. After each use, wipe away grease and dirt. This prevents buildup, which can cause damage over time. A simple cloth can do wonders. Also, inspect the tool regularly. Look for signs of wear, such as chipped edges or rust. Tools in good condition work better. Replace components as needed.
During storage, always keep the tool in a dry place. Moisture can lead to corrosion. Using a protective case can also prevent accidental damage. Relying solely on the tool's design isn't enough; user care is vital. Remember, a neglected tool may fail right when you need it most. Make maintenance a habit. A little effort can save you time and money later.