| 1. 68mm Bottom Bracket Compatibility Guide |
| Threaded shell standard |
BSA / English threaded shell |
Most BSA road and mountain bicycle shells use a 1.37 × 24 TPI thread. A nominal 68mm shell is measured across the frame shell before external cups or spacers are installed. |
Use a compatible external-cup or cartridge-bottom-bracket tool. Confirm the exact spline or interface before purchasing. |
Common in many markets, but thread direction is important: the drive-side cup normally has a left-hand thread and tightens counterclockwise. |
| Shell width |
68mm threaded frame |
Measure the bare frame shell with the old bottom bracket removed. Paint, dirt, adapters, and cup flanges should not be included in the measurement. |
Use a vernier caliper or accurate ruler. Check both shell faces for flatness and damage. |
Do not select a 68mm unit only from the bicycle model name; some frames use 73mm, 70mm, press-fit, or proprietary dimensions. |
| Crank compatibility |
Two-piece crankset with a compatible spindle |
Compatibility depends on spindle diameter, spindle length, crank design, intended chainline, and the manufacturer’s spacer arrangement—not on shell width alone. |
Measure the spindle and follow the crankset’s spacer diagram. Do not add spacers simply to remove play. |
Road double, mountain, gravel, and single-chainring systems can require different spacer layouts on the same 68mm shell. |
| Cartridge bottom bracket |
Square-taper, ISIS-type, or other cartridge spindle system |
The cartridge must match the crank interface and spindle length. A 68mm shell does not identify the required taper or spindle length. |
Use the exact cartridge tool specified for the cup pattern. Apply grease to the frame threads unless the component instructions state otherwise. |
Useful for simple serviceable systems, but cartridge body length and spindle length must be checked separately. |
| External-cup bottom bracket |
Threaded cups with a separate spindle-bearing system |
External cups commonly use a 68mm or 73mm shell with spacers selected according to crank type. Bearing preload must be set without side play. |
Use a torque wrench and the correct cup socket. A preload cap tool may be required for two-piece cranksets. |
Check whether the package includes spacers. Spacer requirements differ between road and mountain configurations. |
| Press-fit frame |
Press-fit shell with no internal threads |
A press-fit frame is not converted into a BSA threaded frame by measuring an approximately 68mm shell width. Press-fit standards are identified by shell diameter and width. |
Use the correct press-fit bearing system, bearing press, drifts, and removal tools. Do not force threaded cups into a press-fit shell. |
Measure the inside diameter and shell width before ordering. A frame marked PF, BB30, or another press-fit designation needs a different solution. |
| Italian threaded frame |
Italian-threaded shell |
Italian threading commonly uses a 36 × 24 TPI thread and is generally associated with a 70mm shell rather than a standard 68mm BSA shell. |
Check the thread standard with a thread gauge or the original component markings before installation. |
Do not interchange Italian and BSA cups even when the crankset appears compatible. |
| 2. Recommended Specification Checklist for a 68mm BSA Purchase |
| Required product information |
Information that should appear on the specification sheet |
Shell standard, shell width, crank interface, spindle length or axle type, bearing arrangement, cup interface, spacer requirements, and installation torque range. |
Compare every item with the frame and crankset before checkout. |
For international purchases, confirm thread standard and tool interface; product photos alone are not sufficient. |
| Weather and riding conditions |
Road, gravel, commuting, touring, or wet-weather use |
Sealed bearings can reduce contamination from water and dirt, but sealing does not eliminate the need for correct installation, drainage, and periodic inspection. |
Use waterproof bicycle grease on frame threads and suitable assembly compound where the component instructions allow it. |
Frequent wet or muddy riding generally requires more frequent inspection than dry recreational use. |
| Bearing preload |
Two-piece crankset with adjustable preload |
Preload should remove lateral play while allowing the crank to rotate freely. Excessive preload can cause drag and premature bearing wear. |
Use the supplied preload cap tool or the correct low-torque tool. Tighten the pinch bolts only after the preload is correctly set. |
Preload-cap torque is usually much lower than cup or crank-bolt torque; use the component instructions. |
| Corrosion protection |
Aluminium, steel, carbon, or painted frame shell |
Clean, dry, undamaged threads are essential. Carbon frames require the frame maker’s approved preparation and torque instructions. |
Use a soft brush, degreaser suitable for the frame finish, clean rags, and a calibrated torque wrench. |
Do not chase or face a carbon shell without professional authorization and the correct tooling. |
| 3. Installation Steps for a 68mm Threaded Frame |
| Step 1: Confirm the frame |
Frame shell and thread inspection |
Remove the old unit and verify shell width, thread type, thread condition, and crank compatibility. |
Use a ruler or caliper, bright light, cleaning brush, and thread inspection tool if available. |
Before ordering This step prevents most compatibility errors. |
| Step 2: Remove the crank |
Existing crankset removal |
Remove the chain from the chainring, release crank fixing hardware, and remove the crank using the correct extractor or manufacturer-specific method. |
Use hex or Torx keys, a crank extractor when required, and a torque wrench for later reassembly. |
Do not pry against carbon crank arms or frame tubes. |
| Step 3: Remove the old bottom bracket |
Cartridge or external-cup unit |
Use the matching removal tool. On a standard BSA shell, the drive-side cup is removed by turning clockwise; the non-drive-side cup is removed counterclockwise. |
Bottom-bracket socket or spline tool, ratchet or breaker bar, and a holding adapter if the tool can slip. |
Confirm the thread direction before applying high force. Penetrating fluid may help with corrosion, but avoid contaminating bearing surfaces. |
| Step 4: Clean the shell |
Frame preparation |
Remove old grease, dirt, thread sealant, and corrosion residue. Inspect both faces for burrs, cross-threading, cracks, or severe paint buildup. |
Degreaser, nylon brush, clean cloth, thread chaser, and facing tools only when appropriate for the frame. |
Stop if threads are damaged A damaged shell should be repaired by a qualified mechanic. |
| Step 5: Prepare the new unit |
Spacer and thread preparation |
Confirm cup orientation, spacer positions, and the required chainline. Apply a thin, even layer of bicycle grease to clean metal frame threads unless the instructions specify another compound. |
Grease, clean gloves, spacer set, and the correct cup tool. |
For carbon frames, follow the frame manufacturer’s specified compound and installation method. |
| Step 6: Start the cups by hand |
Thread engagement |
Start each cup several turns by hand. The cups should enter smoothly without cross-threading or excessive resistance. |
Hand installation first; use the tool only after the threads are properly engaged. |
If a cup will not start easily, remove it and inspect alignment and thread condition. |
| Step 7: Tighten the cups |
Final cup installation |
Tighten to the torque printed by the component maker. Many threaded external-cup systems specify approximately 35–50 N·m, but the published value for the specific unit takes priority. |
Correct bottom-bracket socket and calibrated torque wrench capable of the required range. |
Torque values are not universal. Never substitute the torque for a different bottom-bracket design. |
| Step 8: Install the crankset |
Crank, spindle, spacers, and chainline |
Install the crank according to its system instructions. Confirm that the crank rotates freely and that the chainline matches the intended drivetrain. |
Hex or Torx keys, crank tool if required, preload-cap tool, and torque wrench. |
Use the crank maker’s torque value for crank bolts, pinch bolts, or fixing caps. |
| Step 9: Set preload and check play |
Final adjustment |
Adjust preload until lateral play is removed without creating roughness or excessive drag. Recheck crank rotation after tightening the final fasteners. |
Preload tool, torque wrench, and a clean work stand if available. |
Recheck after the first short ride, especially if the system uses separate preload and fixing hardware. |
| Step 10: Functional inspection |
Safety check before riding |
Check crank tightness, bearing smoothness, chain alignment, pedal installation, and clearance between crank, chainstay, and frame. |
Torque wrench, pedal wrench or hex key, flashlight, and visual inspection. |
Do not ride if there is looseness, clicking caused by movement, binding, or visible frame damage. |
| 4. Tool Selection by Bicycle Frame and Bottom-Bracket Type |
| 68mm BSA with external cups |
Threaded metal or carbon frame |
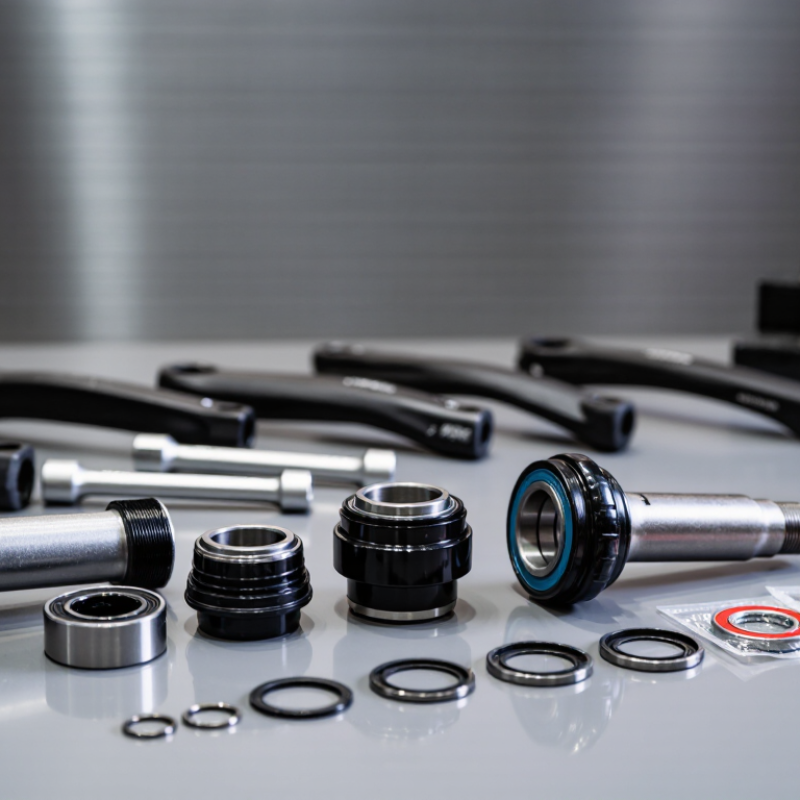
External bearing cups with a multi-notch or spline interface. |
Matching external-cup socket, ratchet, torque wrench, crank tool, preload tool, grease, and cleaning supplies. |
Best general-purpose setup when the crankset and spacer arrangement are confirmed. |
| 68mm BSA cartridge unit |
Square-taper or compatible cartridge system |
Cartridge body installed inside the threaded shell with a fixed cup and adjustable or separate cup. |
Matching cartridge spline tool, long-handle ratchet or breaker bar, torque wrench, grease, and crank extractor if required. |
Tool interfaces vary considerably; match the tool to the cartridge before starting work. |
| Press-fit shell near 68mm |
Unthreaded press-fit frame |
Uses pressed cups or bearings identified by internal diameter and shell width, not by BSA thread specification. |
Bearing press, correct drifts, removal tool, cleaning supplies, and assembly compound approved for the frame. |
Do not use a threaded BSA tool or cup unless a correctly designed conversion system is being installed. |
| Carbon threaded frame |
Threaded carbon shell or bonded insert |
Thread standard may be BSA, but frame preparation and torque limits remain frame-specific. |
Correct cup tool, calibrated torque wrench, approved assembly compound, and non-metallic cleaning tools. |
Follow the frame manufacturer’s instructions; professional installation is recommended when inserts are loose or damaged. |
| Steel or aluminium threaded frame |
Conventional metal shell |
Threads can normally be cleaned and inspected directly, but corrosion and cross-threading must be corrected before installation. |
Thread chaser, degreaser, brush, grease, correct cup tool, and torque wrench. |
Do not remove significant material from the shell without qualified workshop equipment. |
| 5. Global Buyer Verification Checklist |
| Country and language differences |
International product listing |
Confirm whether dimensions are stated in millimetres, whether torque is in N·m, and whether the listing describes BSA or Italian threading. |
Use the technical drawing and written specification rather than translated product titles alone. |
Metric dimensions are standard for most bicycle component listings, while torque should be compared in N·m. |
| Included accessories |
Spacer, preload cap, seals, and tools |
Packages differ: some include spacers or preload hardware, while installation sockets and crank tools are often sold separately. |
Review the contents list and confirm whether the required removal and installation tool is included. |
Budget for the correct tool; a visually similar socket may not engage the cup safely. |
| Replacement planning |
Routine service or upgrade |
Record the original shell width, thread standard, crank model, spindle length, spacer positions, and torque values before disassembly. |
Take clear photos, label spacers, and keep the original parts until the new installation is verified. |
This record is especially useful when ordering replacement parts across different regions. |
| Final purchase decision |
Best product-neutral selection criteria |
Choose the unit that matches the frame thread, 68mm shell, crank interface, spindle or axle dimensions, chainline, bearing design, weather exposure, and available tools. |
Use a compatibility checklist and torque specification before payment. |
Best overall approach Exact compatibility is more important than bearing type or advertised service life. |