How to Install a T47 Bottom Bracket?
Installing a t47 bottom bracket looks straightforward, but precision decides whether the ride feels silent or slightly rough. The T47 standard uses a threaded shell, usually with a 47-millimeter internal diameter. It combines familiar installation methods with modern, wider crankset spacing.
CONEBI’s 2024 European Bicycle Industry and Market Profile recorded approximately 11.7 million bicycle sales across Europe in 2023. PeopleForBikes’ U.S. Bicycle Industry Overview also shows continued demand for performance and serviceable bicycles. These reports do not measure bottom-bracket installations directly. They do show why reliable workshop procedures matter across a growing, technically diverse market.
Chris King, a leading bottom-bracket manufacturer and early T47 developer, describes the system as “the best of both worlds: the durability of a threaded interface and the stiffness of a wide bottom-bracket shell.” That principle sounds simple. It is not. Frame threads can contain paint, debris, or machining residue. A small alignment error may create creaking, drag, or uneven bearing wear. This guide explains how to inspect the shell, select the correct cup standard, apply suitable grease, and tighten the assembly accurately. Practical workshop experience suggests one lesson repeatedly: never force a cup that does not start smoothly by hand. That warning deserves more attention. Even experienced mechanics sometimes rush this step. Use the manufacturer’s torque specification, verify crank compatibility, and recheck the assembly after the first few rides. A careful installation protects the frame, bearings, and rider’s confidence.
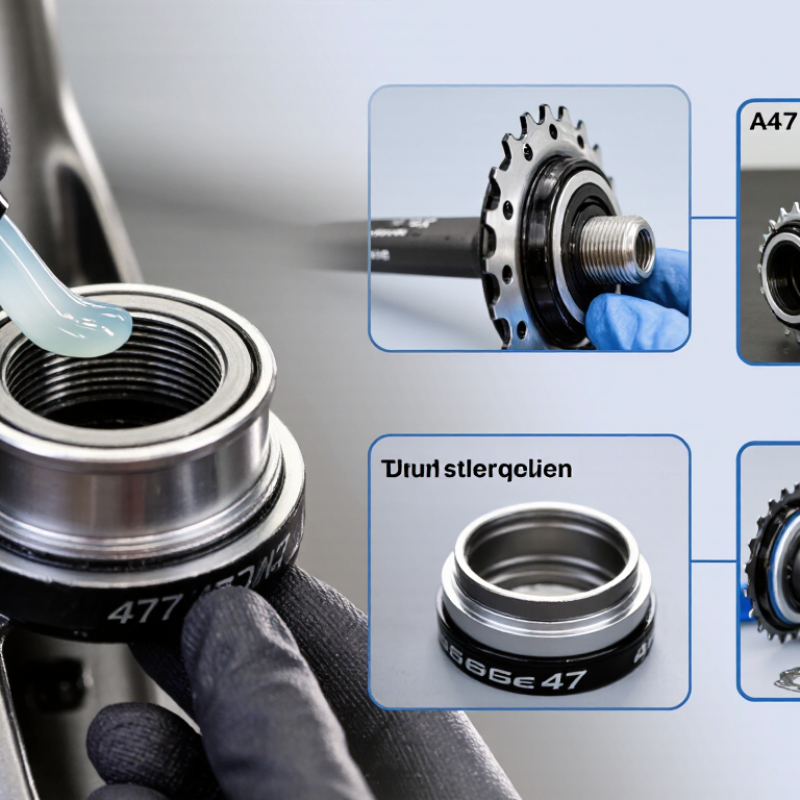
Identify the T47 Bottom Bracket Standard and Required Tools
How to Install a T47 Bottom Bracket?
Identify the T47 standard before opening your tool drawer. A T47 shell uses internal threads and a 47-millimeter nominal diameter. However, shell width and cup position can vary. Road frames often use different widths than mountain frames. Check the frame documentation, shell markings, or the bottom bracket instructions. Do not rely on appearance alone. Measure twice.
You will need a T47-compatible socket, a torque wrench, hex keys, clean rags, and a soft brush. Prepare suitable bicycle grease, unless the instructions specify another compound. A ruler or caliper can confirm shell width. The crank spindle must also match the bottom bracket’s bearing arrangement. Some T47 units use internal cups. Others extend outward. This difference affects clearance and installation depth.
Remove dirt from both threaded sides, then inspect for damaged or crossed threads. Clean threads help the cups start smoothly. Apply a thin, even layer of grease where approved. Start each cup by hand and turn it several rotations. Stop immediately if resistance feels uneven. Install the drive-side and non-drive-side cups in their correct positions. Tighten them with the correct socket, then apply the manufacturer’s stated torque. A torque wrench prevents guesswork.
I once treated “tight enough” as a measurement; it was not.
Before fitting the crank, check that the bearings rotate quietly and the spacers match the spindle length. A final clearance check can reveal a small mistake early.
Prepare the Frame and Confirm Bottom Bracket Compatibility
How to Install a T47 Bottom Bracket?
Prepare the frame before opening the bottom bracket package. Clean the shell with a lint-free cloth and inspect every thread. Remove paint flakes, dirt, and metal burrs carefully. Do not force a cup into a damaged thread. That can create expensive alignment problems.
Confirm the frame’s T47 shell diameter, thread pitch, and shell width. T47 systems may use different internal or external cup layouts. Check whether the frame requires a 68, 73, 86.5, or 92 millimetre shell standard. Then match the bottom bracket to your crank spindle diameter and required spindle length. Measure twice. A compatible thread does not guarantee correct chainline or crank clearance. Test-fit each cup by hand before applying grease. Both cups should turn smoothly without cross-threading. I would also check the manufacturer’s torque specification, because guessing here is an avoidable mistake.
Tips: Use the correct installation tool and a calibrated torque wrench. Apply grease only where the technical instructions allow it. Some frames require a specific seal arrangement or spacer position. Keep the spacers in order during removal. After installation, rotate the spindle by hand and check for roughness, side play, or contact with the shell. If resistance appears early, stop and inspect the threads again. A small alignment problem can become worse under riding loads.
How to Install a T47 Bottom Bracket?
Prepare the Frame and Confirm Bottom Bracket Compatibility
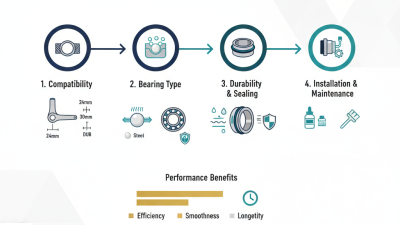
Before installation, clean the threaded shell, inspect the threads, and confirm that the frame width matches the bottom bracket standard. The chart shows common nominal shell widths used when checking compatibility.
A T47 shell uses a 47 mm threaded interface. Nominal shell widths commonly associated with T47 configurations include 68 mm for many road frames and 86.5 mm for wider internal configurations. Always verify the frame specification and the crankset spindle length before fitting the bottom bracket.
Install the T47 Bottom Bracket Cups in the Correct Orientation
How to Install a T47 Bottom Bracket?
Install the T47 Bottom Bracket Cups in the Correct Orientation
T47 cups use a threaded interface, so orientation matters before any tool touches the frame. The drive-side cup usually has a left-hand thread. Turn it clockwise to loosen and counterclockwise to tighten. The non-drive-side cup normally uses a right-hand thread. Its tightening direction is clockwise. Check the arrows or “tighten” markings because some systems use different layouts. Do not trust memory alone.
Clean the shell threads and inspect the contact faces. A small metal chip can prevent full seating. Apply the specified grease or anti-seize compound, then start each cup by hand. The threads should engage smoothly for several turns. If resistance appears immediately, stop and reverse the cup. Cross-threading is an expensive mistake. Tighten both cups with a calibrated torque wrench, following the maker’s specification. ISO 4210 testing principles emphasize secure component retention under repeated loading, while the 2023 Bicycle Product Suppliers Association industry overview recorded roughly eight million bicycle sales in the United States. Reliable assembly therefore matters across a large service base, not only in racing workshops.
Tips: Photograph the original cup orientation before removal. Leave spacers and wave washers in their recorded positions. After tightening, rotate the axle by hand. It should feel smooth, without grinding or side play. I sometimes recheck torque after the first ride; this is not always required, but it can reveal a seating problem I missed.
Tighten the Bottom Bracket to the Manufacturer’s Torque Specification
How to Install a T47 Bottom Bracket?
A T47 bottom bracket uses threaded cups, but installation still demands careful preparation. I begin by checking the frame shell, thread condition, and required spacer arrangement. Clean the threads with a lint-free cloth. Remove grit, paint flakes, and old compound. The threads should feel clean, not sticky. Apply the lubricant or thread compound recommended by the bottom bracket manufacturer. Too much can migrate into the bearings.
Fit the cups by hand and rotate them gently into the shell. They should turn smoothly for several complete threads. Stop immediately if resistance appears early. Cross-threading can damage an expensive frame.
Use the correct installation tool, and keep it fully seated against the cup. I once focused too much on speed and missed a thin spacer. That small mistake changed the chainline.
Tighten the bottom bracket to the manufacturer’s torque specification. Do not estimate by feel. Set a calibrated torque wrench to the exact value and confirm the correct unit, such as Nm.
Tighten each cup in its specified direction, because the two sides may use different thread orientations. Keep the tool aligned with the axle centerline.
A steady pull gives better control than a sudden jerk. After reaching the specified torque, inspect the spacers and cup contact surfaces.
Do not use the crank-arm torque value for the bottom bracket. These specifications are different.
Recheck your work before installing the crankset.
Inspect the Crankset Fit and Verify Smooth Bearing Operation
Before installing a T47 bottom bracket, inspect the frame threads and crankset carefully. Remove dirt, old grease, and metal fragments from the shell. The threads should feel clean, not gritty. Check the crank spindle for scratches, raised edges, or uneven wear. A damaged spindle can imitate a bearing problem.
Apply a thin layer of suitable grease to the shell threads and bearing cup threads. Install each cup by hand first. If resistance appears immediately, stop and realign it. Cross-threading can permanently damage the frame. Use the specified tightening torque with a calibrated torque wrench. Install spacers in the correct order, because incorrect spacing can affect chain alignment and bearing preload.
Fit the crankset and tighten its fixing system according to the crank manufacturer’s instructions. The crank should rotate freely without side-to-side movement. Listen closely. A healthy bearing usually sounds quiet and feels consistent through a full rotation. Roughness, clicking, or tight spots require inspection rather than extra tightening. Even experienced mechanics can miss a misplaced spacer. I have found that a second visual check often reveals the mistake. Hold the crank arms and gently rock them laterally. Any noticeable play suggests incorrect preload, loose hardware, or worn bearings. Do not confuse normal seal drag with damaged bearings; new seals may feel slightly firm at first. Rotate the crank several times, then recheck the fixing hardware after the initial ride.