How to Use a Square Taper Bottom Bracket Tool
A square taper bottom bracket can seem stubborn, even when the frame and parts are in good condition. The right square taper bottom bracket tool helps you remove or install a compatible cartridge without damaging its splines. But the tool must match the bottom bracket interface. Small details matter.
This guide explains how to identify the correct tool, secure it fully, and apply controlled force. You will also learn what to check before turning the wrench, including the crank’s removal, the cup design, and the tool’s fit. A loose or mismatched tool can slip and round the notches, so stop if it rocks or fails to seat. Fit comes first.
Thread direction can vary by side and bottom-bracket standard, so verify the maker’s instructions before applying force. Keep the frame steady, use a suitable wrench, and avoid extending leverage without a clear reason. If corrosion or damage makes the cup resist, pause rather than forcing it. That may feel slower. It is often cheaper than replacing a damaged part. The steps here are practical guidance, not a substitute for checking your specific component’s markings or service information.
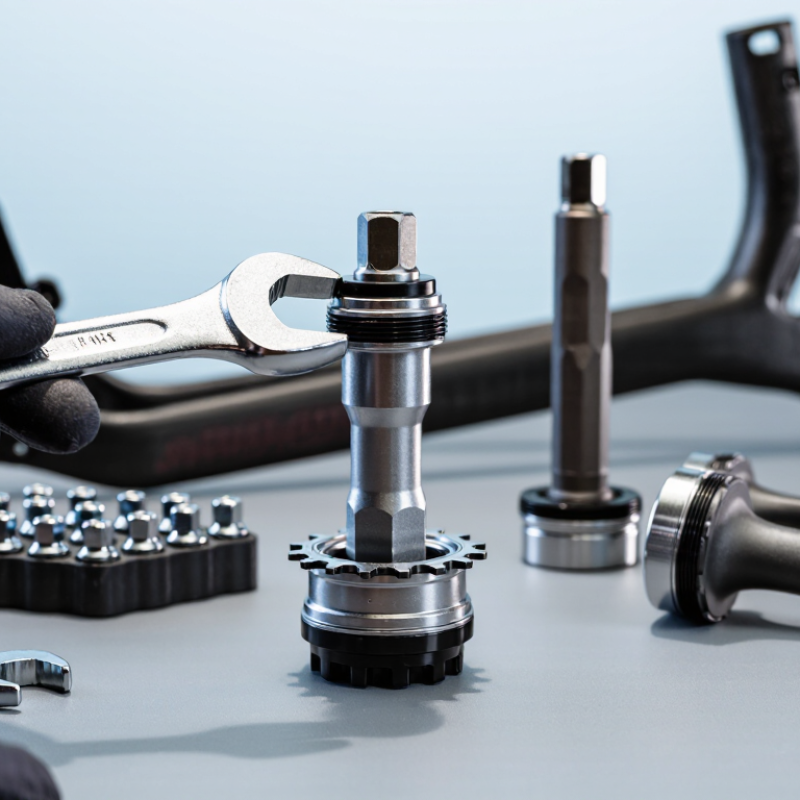
Identify the Square Taper Bottom Bracket and Compatible Tool
A square-taper crank has a four-sided spindle interface, but that shape does not identify the bottom-bracket tool. The tool fits the cups or cartridge body, not the square spindle. Look beneath the crank and frame shell: count the cup’s splines or notches, and note whether the unit is a sealed cartridge or an adjustable cup-and-cone assembly. Small differences matter.
ISO 6695:2015 sets requirements and test methods for bicycle crank assemblies with square-taper interfaces. It helps distinguish the crank connection from the separate bottom-bracket removal interface. Check the tool maker’s stated spline pattern and dimensions against your cup. Many cartridge units use a 20-spline fitting, but that is not universal. Some cups use external notches or another pattern. A photo can mislead.
Clean away grease and dirt first. Seat the tool fully, then hold it straight while loosening the cup; a shallow or tilted fit can round its teeth. Not sure? Don’t force it. Confirm the cup pattern with a clear view, and check whether the drive side has a reverse thread before turning. I would not choose a tool from the square-taper shape alone. It seems obvious, yet it is an easy mistake.
How to Use a Square Taper Bottom Bracket Tool - Identify the Square Taper Bottom Bracket and Compatible Tool
| What to Identify | Visible Clues | Likely Tool Type | Compatibility Check | Use Notes |
|---|---|---|---|---|
| Square-taper crank interface | The crank arm fits onto a four-sided, tapered spindle. A fixing bolt or nut is usually visible at the center of the crank. | A crank-arm extractor is needed to remove the crank; it is not the bottom bracket tool. | Check that the extractor matches the crank’s extractor threads and has a tip that can press against the spindle end. | Remove the crank before trying to engage the bottom bracket tool. Do not use the extractor to turn the bottom bracket cups. |
| Cartridge bottom bracket with splined cups | With the crank removed, the drive-side cup or cartridge unit has evenly spaced internal splines around its opening. | A matching splined bottom bracket socket, commonly a 20-spline pattern on many cartridge units. | Count the splines and compare the tool’s shape and diameter with the cup. Spline count and size must both match. | Some compatible sockets also have a hex drive. Keep the tool fully seated while applying force. |
| Bottom bracket with external notches | The cup has large, shallow notches around its outer edge rather than narrow internal splines. | A notched external-cup tool made for that specific cup pattern. | Match the number, spacing, and diameter of the notches. External-cup tools are not interchangeable with most cartridge sockets. | A tool for an external-cup bottom bracket may not fit a square-taper cartridge unit, even if both are installed in the frame shell. |
| Older adjustable cup-and-cone bottom bracket | One side may show a lockring and an adjustable cup with pin holes or flats; the spindle and loose bearing arrangement may be visible after disassembly. | A pin spanner or lockring tool suited to the specific cup and lockring. | Inspect the cup and lockring directly; this system does not use the same tool interface as a splined cartridge unit. | Keep track of the bearing orientation and adjustment parts during service. The required tool depends on the cup design. |
| Square-taper cartridge with a removable or fixed cup | One side may have a removable splined cup, while the opposite side may have a different interface or be part of the cartridge assembly. | The matching tool for each removable component; some units require a tool on only one side. | Inspect both sides before choosing a tool. Do not assume the left and right interfaces are identical. | Thread direction varies by side and bottom bracket standard. Confirm the correct loosening direction before turning. |
| Tool engagement and removal | The tool sits squarely in the cup with its teeth or splines fully engaged and little side-to-side movement. | A close-fitting bottom bracket socket, held by hand or secured with a compatible retaining bolt where appropriate. | If the tool rocks, slips, or engages only a few splines, stop and recheck the interface and tool size. | Use steady force and keep the tool aligned with the spindle axis. A poorly seated tool can round or damage the cup. |
Important: “Square taper” describes the crank-to-spindle connection, not the bottom bracket tool interface. Identify the cup or cartridge features after removing the crank, then match the tool to those features. Tool patterns vary, so visual inspection and a test fit are more reliable than assuming compatibility from the crank type alone.
Related Posts
-
How to Use a Square Taper Bottom Bracket Tool?
-
Why You Need a Bottom Bracket Press Tool for Bike Maintenance?
-
2026 Best Bottom Bracket Threading Tool for Global Buyers?
-
Top 10 Bottom Bracket Press Tools Buyers Need?
-
Top Tools for Square Taper Bottom Brackets in 2025 You Need to Know
-
What is the Best Bottom Bracket Threading Tool for Bike Repair?
This website uses cookies to ensure you get the best experience possible. Learn more.